Artikel
Beer brewing for dummies
This week's student Nikita (student Plant Sciences) will guide you through a home beer brewing process.
Materials
First of all: your materials! You need quite some starting materials, usually an investment of around 40-60 euros, so if you think you won’t use it more than once, maybe consider borrowing the equipment from beer brewing friends. However, if you want to brew more than once, or maybe want to try it with your housemates, these two sites are perfect for ordering equipment and ingredients:
https://www.brouwland.com/nl and https://www.braumarkt.com .
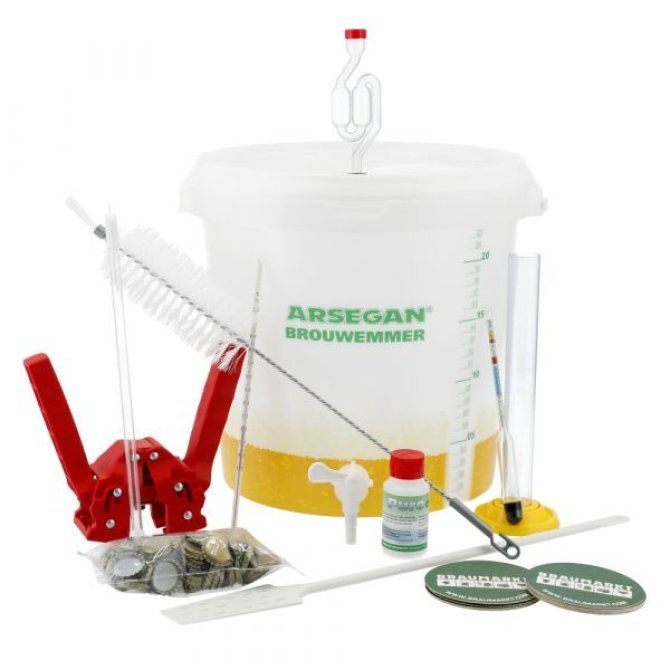
These sites have starter kits with all the equipment you need, but if you want to buy it yourself you’ll at least need:
- Brewing bucket, whichever size you want, the bigger, the more beer you can brew at once.
- Either a crown corker and crown caps (included in most starter kits, you can use this on your empty crates of beer) or swing clasp bottles (use fermentation grade! Might explode otherwise).
- Cleaning materials! If you don’t clean your equipment properly you get all sorts of funky fungi and bad bacteria. Buy some OXI (sulphite cleaner) and a bottle brush, to get in all those nasty old bottles that’ve been rotting in the corner of the living room for half a year.
- A pan big enough to fit everything. Quite a challenge. If you want to brew 10 L, have a pan for at least 20 L
- Thermometer. Not one that you use for checking fevers, no, a food grade one.
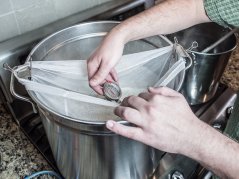
- Personal recommendation: a brewing bag! For batches of 5 or 10 L, the so called brew-in-a-bag method is wayyy easier than the alternative filtering. If you don’t want to buy a bag you can sew one yourself from cheese cloth, but make sure it fits over the rim of your pan.
Ingredients
- 1 kilogrammes of pilsner malt
- 1 kilogrammes of wheat malt
- 14 grams of Challenger hops
- Any type of top-fermenting yeast
- 200 grams of white sugar (kandijsuiker)
- 6 grams of coriander seeds
- 10 grams of orange peel (try to avoid the white stuff right below the peel)
What's next?
You’ve gotten all your materials, now find a day where you don’t have anything else to do. This process can take up to 10 hours. Don’t get scared, it’s really fun, I promise. Get together on a Saturday with your housemates. Or any other day, it is not like we have to get up early the next day.
Then, we’ll move onto the mashing of the grains (maischen in Dutch). Add your malts to your pan together with 1.7x the amount of water you want as end result. So for 10 L of beer, add 17 L of water to the malts. There’s gonna be a lot of evaporation. Most recipes will have a mashing scheme. This indicates at which temperatures you will need to cook your grains and for how long. Different temperatures will release different types of sugars (fermentable or non-fermentable) and will decide on the dryness of your beer. Follow it as closely as possible. DO NOT let your temperature get higher than 80 °C before finishing your mashing scheme, you won’t get any sugars out of your malts after that temperature. When warming up from one temperature to the next, do it slowly and keep stirring it. If you’re following the basic recipe I wrote down above I recommend this mashing scheme:
Then it’s time to remove the bag. All the grains have done their jobs and given off their sugars to the water. If you’ve done it right the water is now amber to deep brown and VERY sweet. Remove the brewing bag and squeeze the liquids out carefully (it’s hot!). The grains are rich in nitrogen and your compost will love you for it.
| Which Ingredient | Boiling time |
|---|---|
| 2 grams of Challenger hops | 60 minutes |
| 2 grams of Challenger hops | 30 minutes |
| 200 grams of white sugar | 10 minutes |
| 10 grams of orange peel | 10 minutes |
| 6 grams of coriander seeds | 10 minutes |
| 10 grams of Challenger hops | 5 minutes |
Now we’ve added funk and flavour to our beer. It’s time to cool it down and fast. This can be done by placing it in a big bath/sink with ice or a continuous flow of cold water. Cool it down to room temperature. This is also the part where you want to disinfect EVERYTHING that is going to touch the beer. Your hands, your brewing bucket, your spatula’s and the surface you’ll be working on. Once the temperature goes down every little bacteria will want to feast on all those delicious sugars in your beer, so be careful!
Also, while your beer is cooling down, activate your yeast. Put it in a disinfected bowl with warm water and some sugar, cover it with a disinfected plate and leave it be for 10-20 minutes. Once your beer is cooled down, filter it through a, yes disinfected, strainer (getting those hop bells and ingredients out) into your brewing bucket, which is, yes, DISINFECTED. Add your activated yeast to your beer. Now the big bucks will start rolling in. Take the water seal from your lid and fill it until the water sits about halfway, add it back to the lid and pop the lid on that bad boy. Put it in a room where it’s consistently 18-22 °C, away from sunlight. You’re finally done, go drink a beer. But wait this isn’t beer yet. No it isn’t. It’s gonna ferment. This is my favourite part. The first 12 to 24 hours the beer is gonna be quiet and then BOOM main fermentation, bubbles are shooting from the water seal, it sounds like a warzone in the living room. This is the yeast converting the sugar into alcohol, so praise those sweet, sweet bubbles. This main fermentation will take anywhere from 5 days to a week. You know it’s done when there’s no bubbles coming from the airlock for about a minute straight.
Now, usually a week after the main brewing, you’ll need to transfer the beer to a clean vessel. I usually put the beer in a disinfected pan, clean out the brewing bucket and put it back in. You’ll want to remove all those dead yeast cells at the bottom of the bucket, otherwise your beer will taste like dead yeast. Here’s the catch: you need to reduce the exposure of the beer to oxygen to a minimum. This can be pretty hard, so do this job with preferably 2 people. Use a disinfected hose to siphon your beer from your brewing bucket to your disinfected pan. Stop once you only suck up goo from the bottom, it’s gross. Clean your brewing bucket thoroughly and siphon the beer back. Lid back on and now store it in a cool, dark place (something like a cleaning closet). This is going to start the lagering stage. This is when the beer matures and gets its funky flavours. This is also the time to add hops if you want to try dry hopping! Lager for four weeks.
Here comes the last big step before you can finally enjoy your beautiful, home-made beer: the bottling. First we drag the beer from the cellar back to the kitchen. Then we add a bit of sugar: this is to make sure your beer pops when you open it. My little trick is to dissolve 8 grams of sugar per litre of beer in warm water and then add it to the bucket. Stir it in CAREFULLY, avoiding the bottom, so you don’t disturb the goop layer on the bottom, you don’t want any of that in your actual beer. Then, clean out all your bottles with OXI and a bottle brush, be very thorough with this. Fill your bottles using the little tap on the bottom of the bucket, leaving around 2 cm headspace on each bottle. Don’t splatter the beer to much, oxygen isn’t great for the taste. Then put on the cap using the crown capper of plop on the clasp on swing clasp bottles and voila, you’re done.
But wait this isn’t beer yet. No. It isn’t beer yet. God this takes a long time. Yes, it does. It’s going to carbonate, meaning the extra sugar that you put in at the end is going to ferment, but now the produced gasses from that can’t escape, meaning it’ll get trapped in the bottle and carbonate the beer. Put your filled bottles somewhere away from sunlight (maybe covered in a dark blanket) at room temperature for two weeks. Then, it’s time. You’ve waited so long for this. 7-8 weeks to be exact. Put your beers in the fridge, wait for a few more hours until those babies are cold and finally, crack ‘em open. The most satisfying feeling is that TSSss of your home-made beer. Pour it into a glass and enjoy it, you’ve earned it. It is a long process, but making beer from scratch is a very fun hobby to do, especially if you also like baking, fermenting, making things from scratch et cetera.
Do you have a unique, fun or exciting hobby you would like to share with us and the rest of the WUR community? Send an e-mail to online.events@wur.nl with a short story and some photos and maybe you will be featured on this page!


