Fixing bikes for beginners
This week's blogger Max (student Molecular Life Sciences) explains the basics of fixing your own bike.

This bike was built in 1980, and left in a shed without seeing use for the last 10 or so years, so of course there were some repairs that needed to be made. The brake pads had completely dried up and turned brittle, and the back tire was worn down to its very last threads. The back derailer had also taken a hit at some point, meaning it needed to be readjusted, and there was a lot of cleaning to be done. After locating the required parts, it was time to get to work.
After a few hours of blood, sweat and tears this golden bike was finally ready for the road again, despite being almost twice my age! It’s one of the best feelings in the world to get on a bike that was barely rolling around just a few days ago and to feel it riding smoothly again.
For some of us, bike maintenance may seem like an impossible task, and even to change a tire you might end up at a bicycle repair shop.
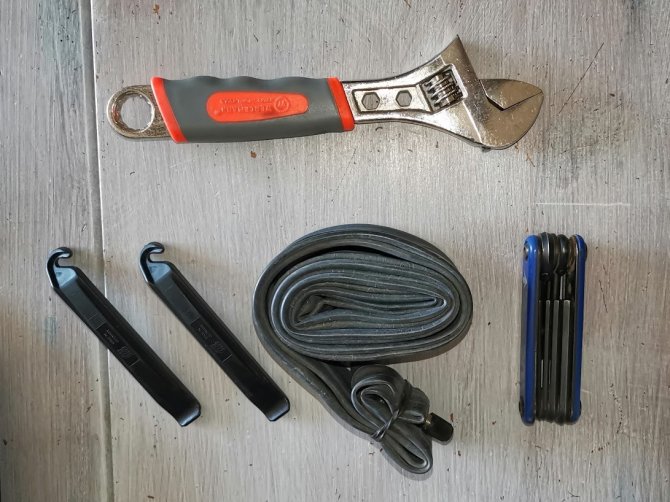
In reality however, many of the repair jobs involved in bike maintenance can be done at home using a few basic tools. I will explain to you how to change out an inner tube, so that next time your tire bursts, you can save yourself some costs and enjoy the fruits of your own labour. If you have any trouble following this tutorial there are many videos on youtube that should be able to help. Good luck!
How to change a tire in 5 steps
Step 1: removing the wheel of your bike.
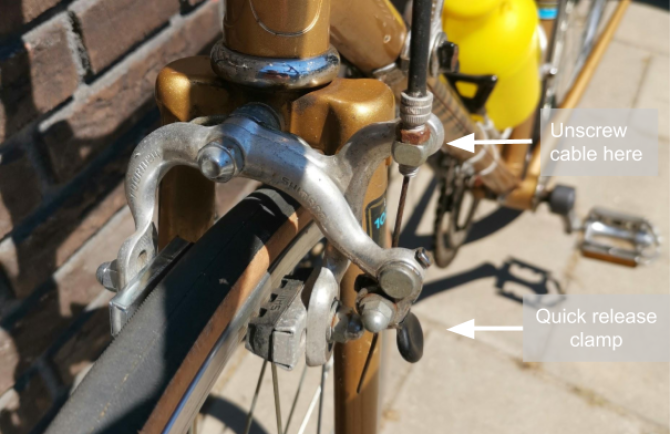
You may also have to take off the brakes by unscrewing the nut securing the brake cable. You might want to mark the location on the cable where it was secured, so that you can easily reattach it in the right location later. If your bike has a quick release lever on the brakes, you can use this instead (see picture).
Step 2: taking off the outer tire.
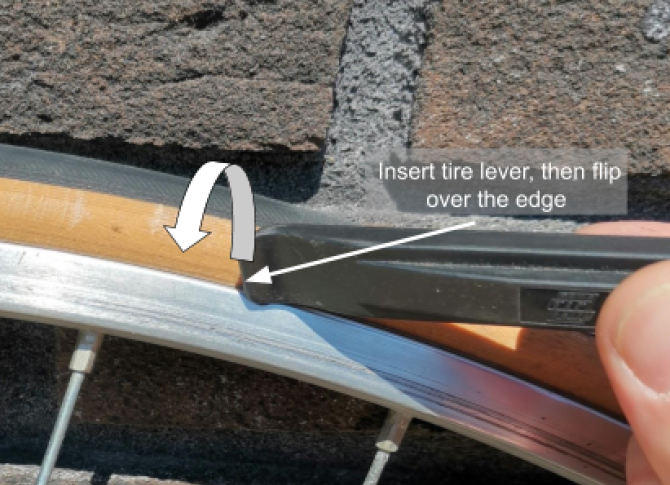
Now stick a tire lever between the rim and the edge of the tire (see picture). Flip it over the edge of the rim. Stick another tire lever between the rim a little further ahead, and flip it over too. This will pull a part of the outer tire over the edge, and will allow you to open it further by hand.
Step 3: Replacing the inner tube
If you want to also replace the outer tire, you can now also fully remove that and put on a new one.
If you are replacing the inner tube because of a leak, it is important to check the inside of the outer tire for small objects, like thorns or pieces of glass. It is very possible that whatever caused the leak is still in the tire. Once you have checked the entire tire, you can insert the new inner tube, starting with pushing the valve through the hole in the rim. Then carefully insert the inner tube through the gap between the outer tire and the rim. Make sure it does not get twisted somewhere. Screw on the valve and slightly inflate the inner tube, so that it lightly pushes into the outer tire. This is to prevent the inner tube getting pinched between the outer tire and the rim when pulling the outer tire back over the edge.
Step 4
Step 5
Do you have a unique, fun or exciting hobby you would like to share with us and the rest of the WUR community? Send an e-mail to online.events@wur.nl with a short story and some photos and maybe you will be featured on this page!


